
Why your moisture balance is essential for crispy clear ecoprints
Why is the moisture balance so key?
Many ecoprinters, including myself, start with blurry, brown prints. If your ecoprints keep turning out blurry, brown or lacking detail, you’re not alone. Many ecoprinters struggle to achieve crisp, clear leaf prints – and the reason often comes down to one of the most important key factors - moisture balance.
When I began my printing journey many years ago, I was SO excited just to see colors transferred from plants to fabric. But over time, I became a bit tired of getting the same brown and maybe a few yellow hues over and over again. The sharpness was lacking because I didn't understand how important it was to balance the moisture correctly. Once I cracked that code, my prints changed dramatically.
And there is a HUGE difference between a blurred silhouette and a detailed print of a leaf, this is where the right moisture balance makes a difference.
Understanding moistures impact
The fact is, that the optimal moisture balance in your ecoprints, is one of the most important keys to achieving crisp and detailed results. Moisture plays a crucial role because it transports the pigments from the plants to the fabric, where they can bond with the dye and the fibers. Too much moisture causes your prints to run, resulting in the details simply being “washed away”, while too little moisture can make them fragmented and unclear.
I have seen many printers completely reduce the moisture when they hear that it needs to be balanced, but that is a misunderstanding, as we need moisture for the colors to move from plant to textile.
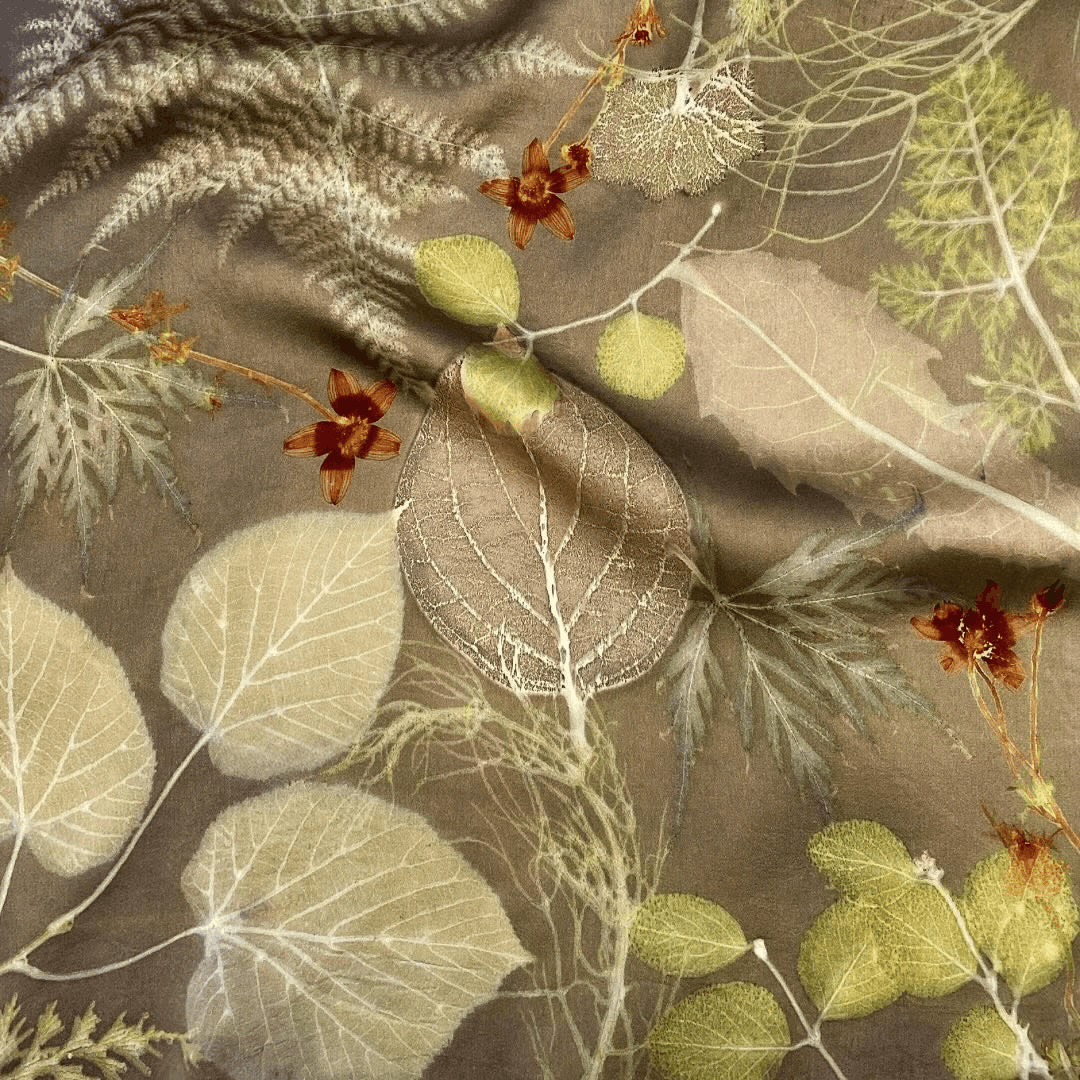
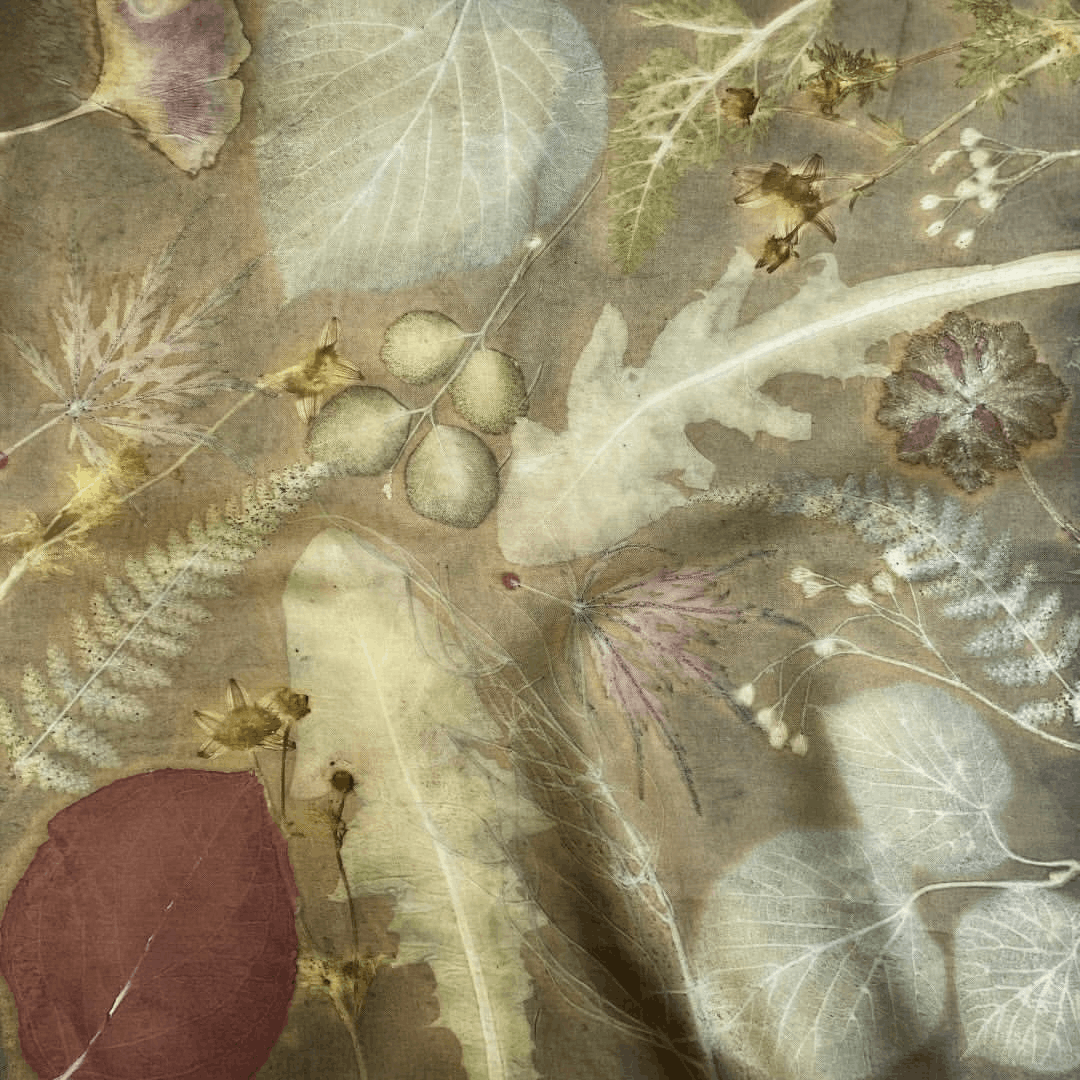
The two images below show ecoprints on silk with the same background color. With optimal moisture balance, the leaf prints are sharp and detailed. With too much moisture, the result is a blurry ecoprint where the color washes out and the details disappear.
So how does moisture reach the print?
Moisture can enter the print in many ways. It can be due to the fabric being moist itself - this is as mentioned necessary for the colors to move from the plant to the fabric.
However, moisture can also come in through other channels, and of course you have to have these factors in mind when you test.
It can be present in the plants themselves, especially in spring when there is a significant amount of liquid in the leaves, making it particularly challenging to control moisture during that time.
Additionally, moisture can enter through a dye blanket, which allows for background color application (you can balance that quite precisely as well).
Last but not least, a considerable amount of moisture can also come from steaming, which can be effectively managed too.
The right moisture balance varies from fiber type to fiber type.
The right moisture balance varies depending on the type of fabric, as both the weave, fiber type, and material affect how the fabric holds moisture. Wool, for example, can absorb up to 30% of its own weight in water without feeling wet, while linen can only hold about 12-20% before it starts to feel damp. Therefore, it’s important to always test your different fiber types, so you can achieve crisp and clear prints every time.
In the guide, I introduce a systematic approach to testing the moisture. It may seem overwhelming if you’re not into being systematic, but I promise that when you’ve tested a material once, you will know exactly how moist the fabric should be, every time you print on that particular fiber.
Of course, you can also take a more intuitive approach to the test, and work with three different intuitive levels of moisture, but the systematic method yields much more precise results, and the best part is that you can achieve the same results again and again, because you know the moisture level of a certain type of fabric more precisely.